This tutorial will guide you through the steps to create a blog using WordPress.
Getting Started
Registration
1. Go to http://www.wordpress.com and click on the “get started” button.
2. Fill in the registration form and don’t forget to choose a relevant name for your blog address (actionmovies.wordpress.org, funstories.wordpress.org, myname.wordpress.org, etc.)
3. When you’re done, click on “Create Blog”. Note that you will be able to upgrade to the paid version from the back end (administration area) at your convenience.
4. Check your mailbox and verify your email address as soon as you possible. You have a two days limit for this.
5. Your email subject will look like this:
Setting up your first blog
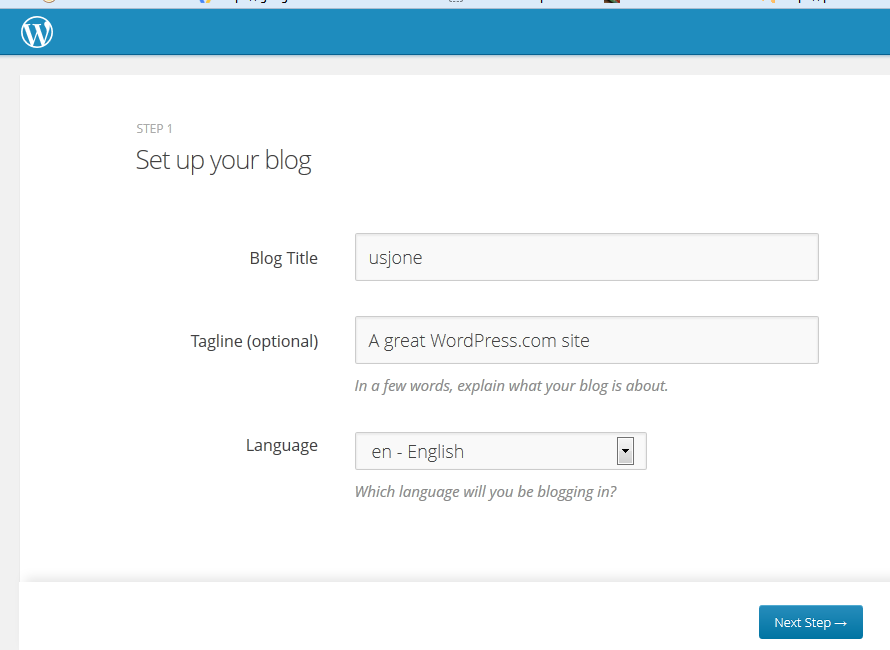
6. Go back to WordPress.com and log in to your account (if you’re logged out). Choose your blog title and tagline (these will appear in the header area of your blog – depending on the theme chosen and options). Depending on the method you’ve used to go back to the site, you may be redirected to the main page (step 11).
7. Choose your template (this is the layout format of your website). In the example below, we chose the 2012 template:
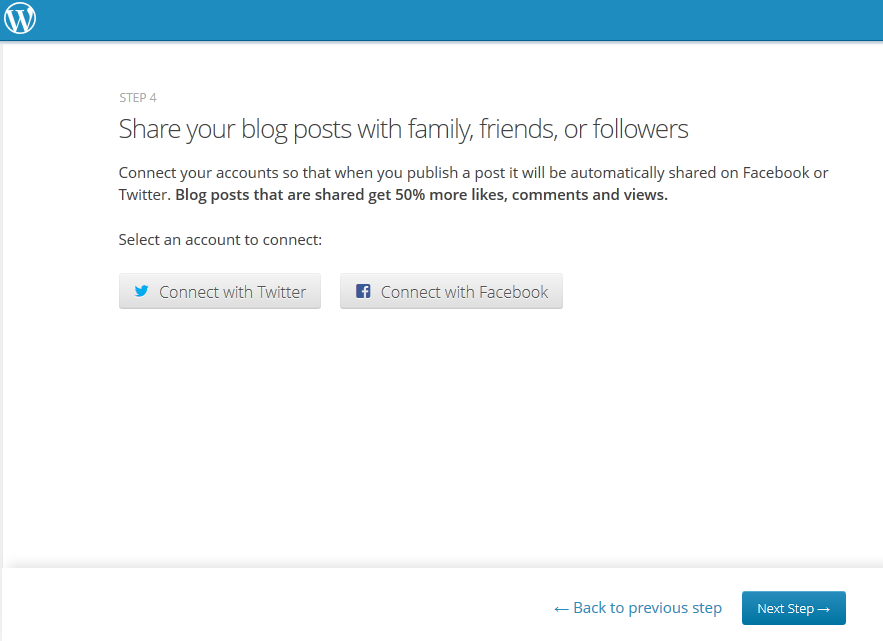
8. Wordpress.com offers you an option to sync with Facebook or Twitter. Your posts will automatically be shared on both platforms if you use the Facebook or Twitter Connect options:
Creating your first post
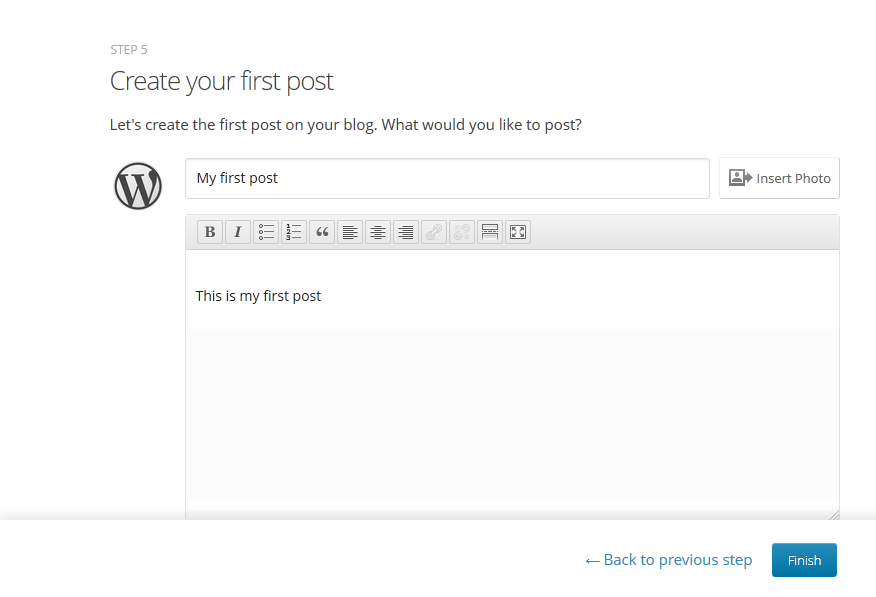
9. It’s time to start blogging! Create any type of post from the available options – In the example below, we chose “text” which is the easiest type to start with:
10. Write a welcome message:
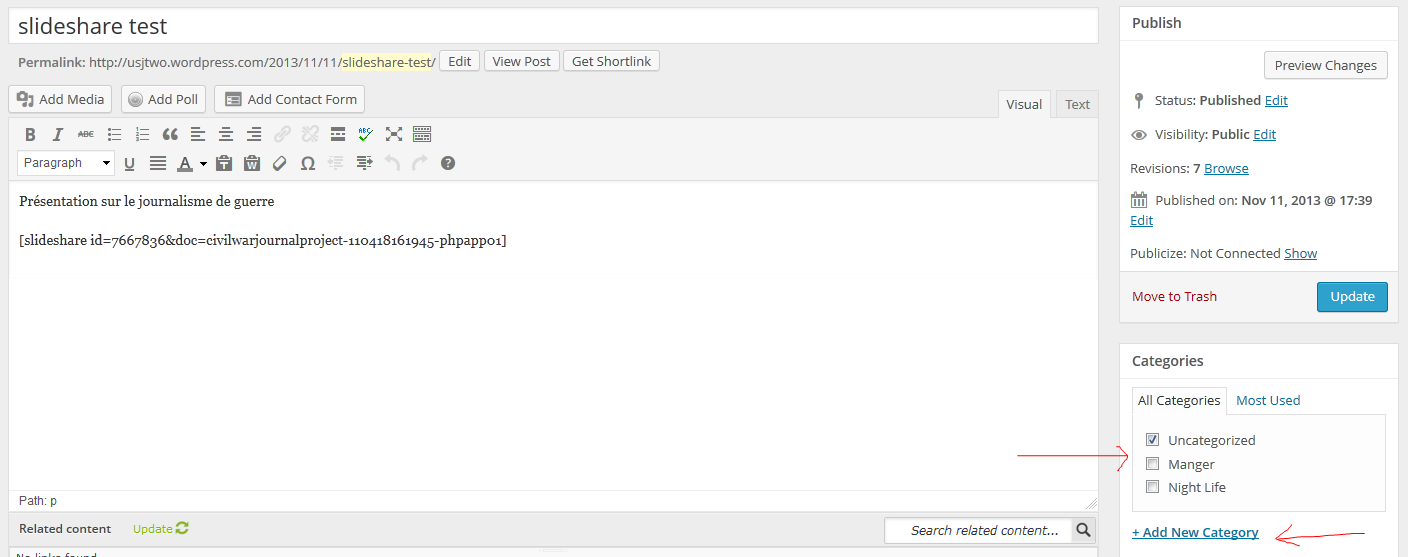
11. Remember to add a post category. This is very essential in a Blog for organization and readability purposes.
12. Click on the Publish button to publish your post (or the update button if you’re revisiting your post).
Logging in to WordPress account
13. The next time you log in to WordPress.com, you will be redirected to your account page where you can have and manage different blogs.
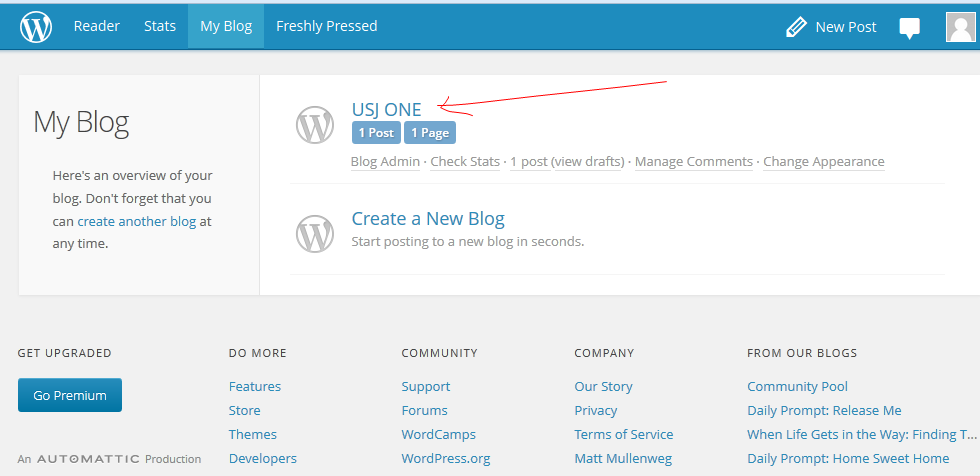
14. On the “My Blog” page, you have your blog’s list and the option to add other blogs (note the “create another blog” option under “My Blog” on the left). To access your current blog, click on it’s name.
Logging in to the administration area
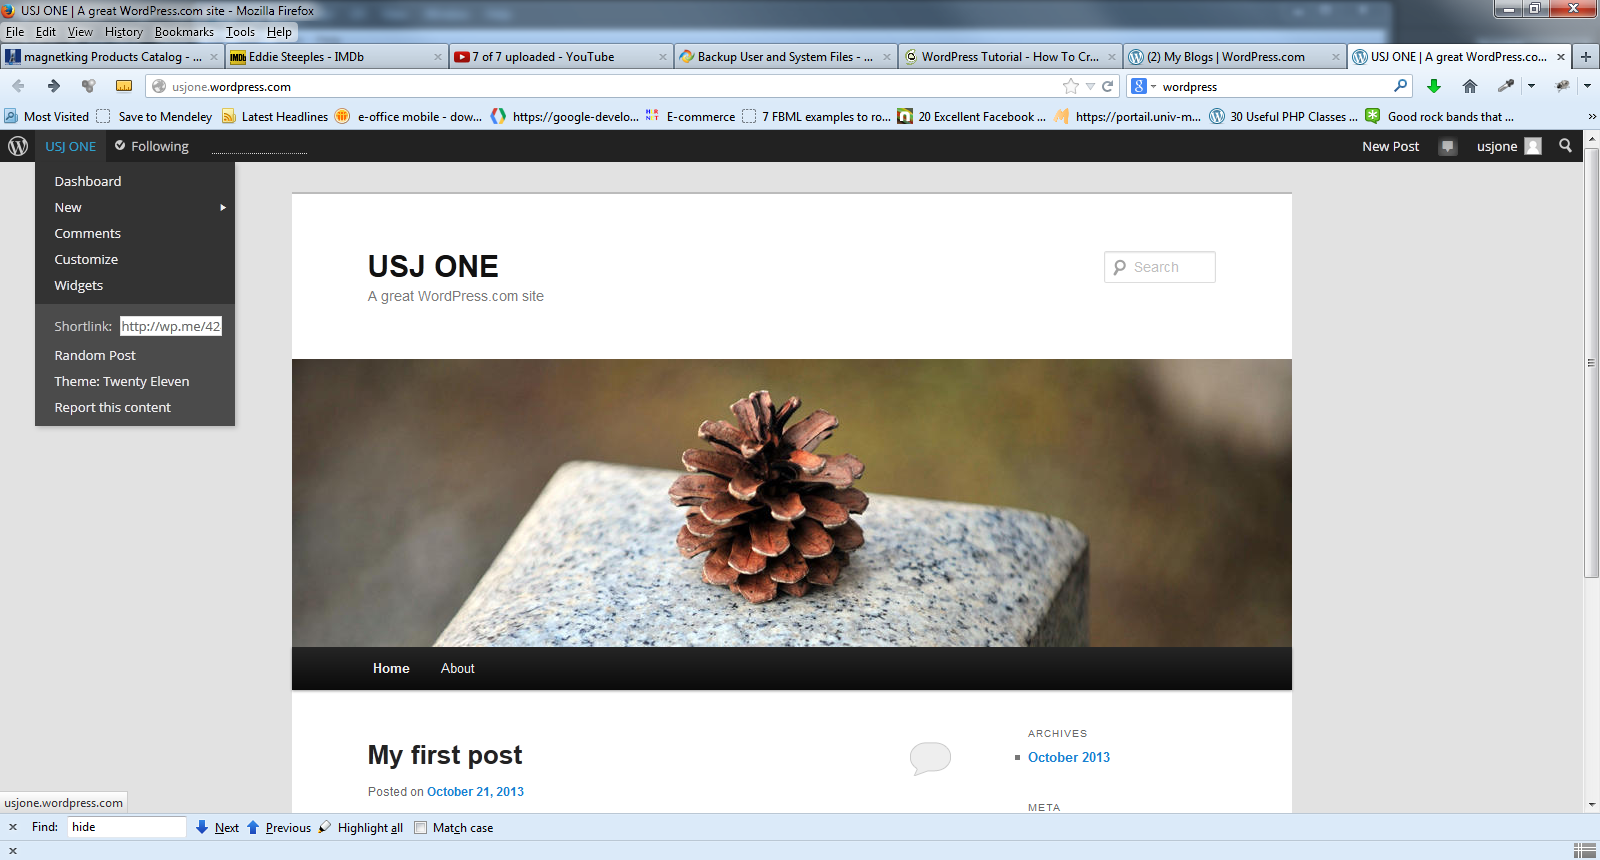
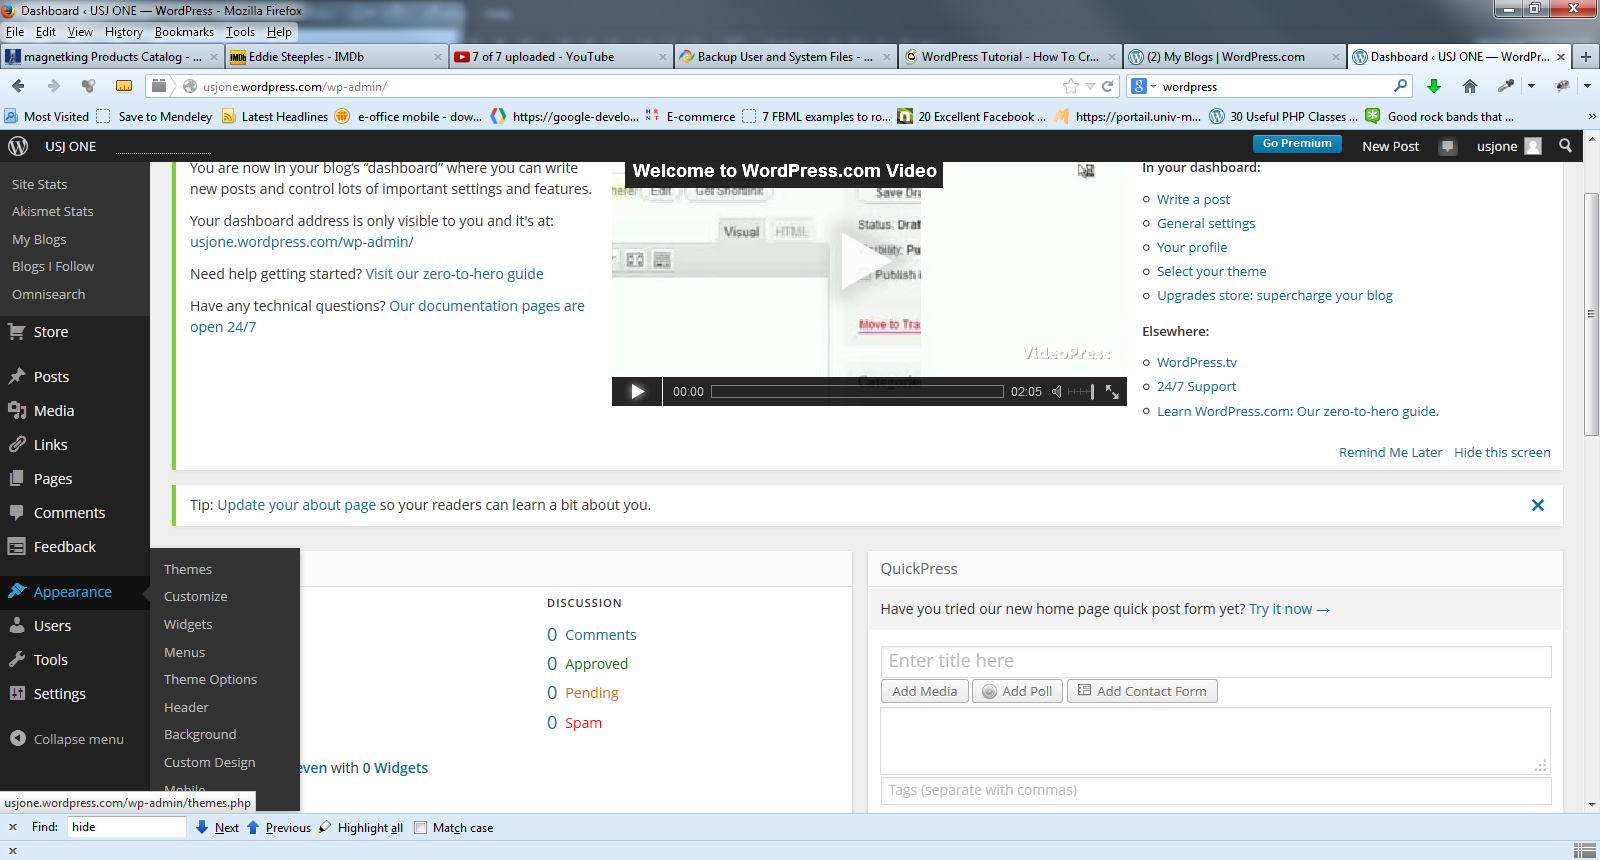
15. This is your blog. You can, at any moment, click on your username (upper menu) to access the Dashboard (Administration area).
Creating a page
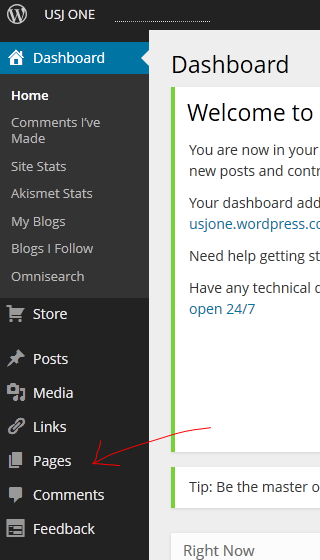
16. There are two major types of publications: pages and posts. Pages are mainly static pages or pages that are not time-related, in the sense that they do not expire. For instance, your contact info, the description of the blog, your résumé. Posts, on the other hand, are time relevant. These can be recipes, new products information, news, comments, etc. Create your first page under Dashboard > Pages.
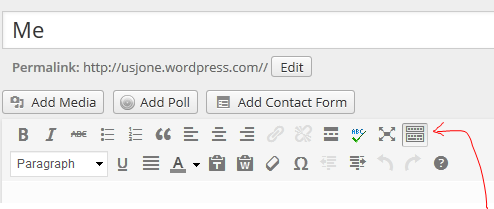
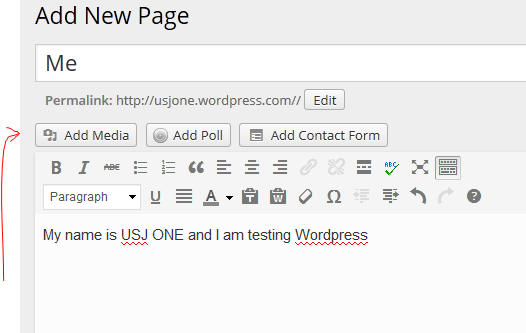
17. Creating a page is very similar to writing a post. Just type a title and the content in the dedicated form. Note the “Kitchen Sink” button that will display an additional row of commands including “paste as text” and “paste from word” to remove any formatting or try to adapt the format from Microsoft Word to WordPress.
18. The “Add Media” button allows you to add images and other type of Media (Music, Video, etc.)
19. You can either drag-and-drop and image to the page or browse for it from your computer. Once it’s done, insert it into page.
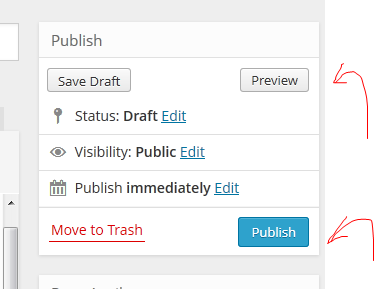
20. Preview then publish your page.
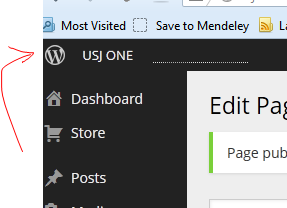
21. Click on your blog’s name and notice that your page has been automatically added to your blog’s main menu
Customizing the menu
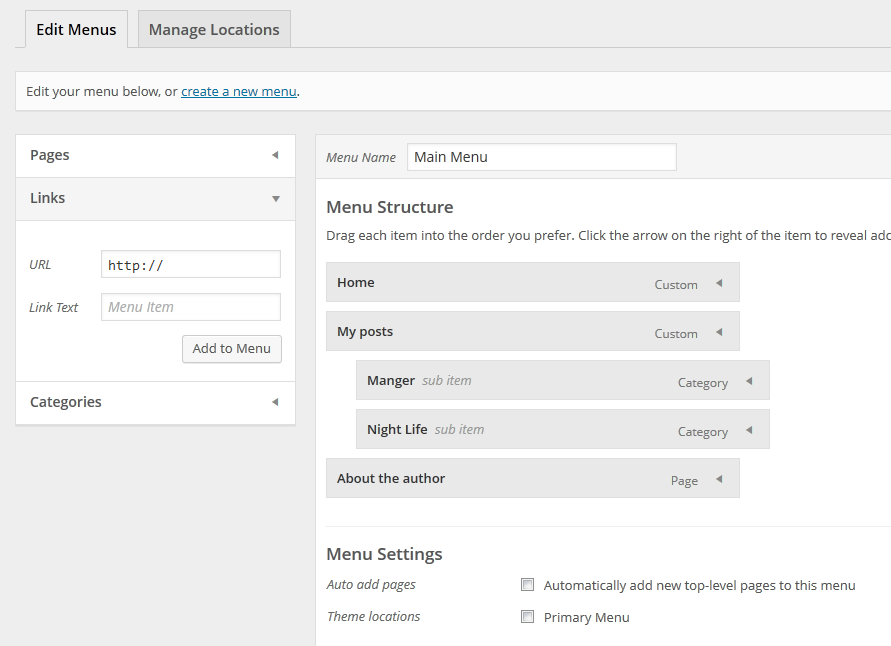
22. If you need a customized menu, go to Appearance > Menus
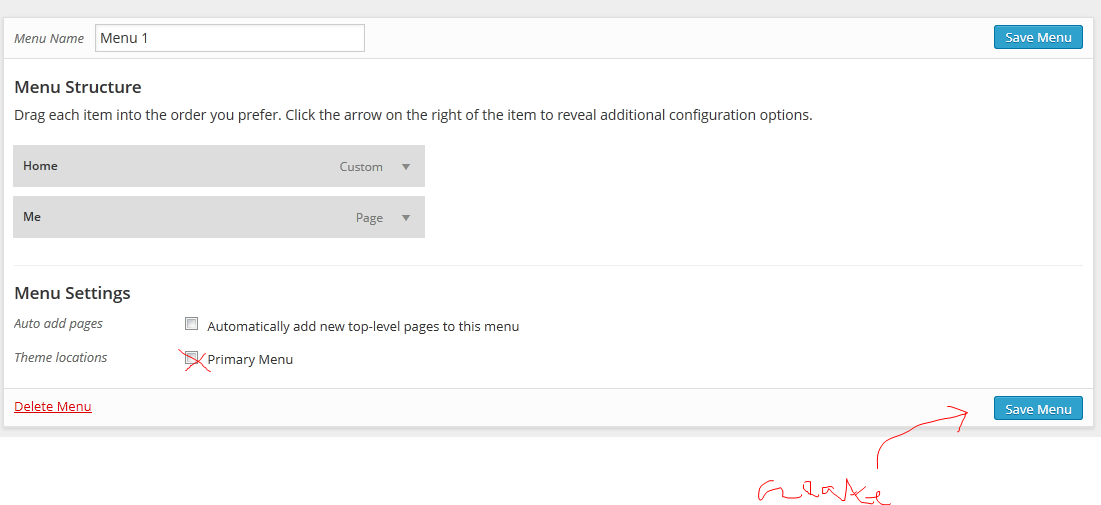
23. Drag and drop Pages, Categories or create custom Links. You can change the placement of menu items by dragging up and down or right and left (submenus). Once you’re done, rename the menu and save it. Note the “auto add pages” option to automatically add new pages to the menu and the menu location which depends on the theme you’ve chosen (some themes may have several menu placements – header, footer, section to the right, etc.).
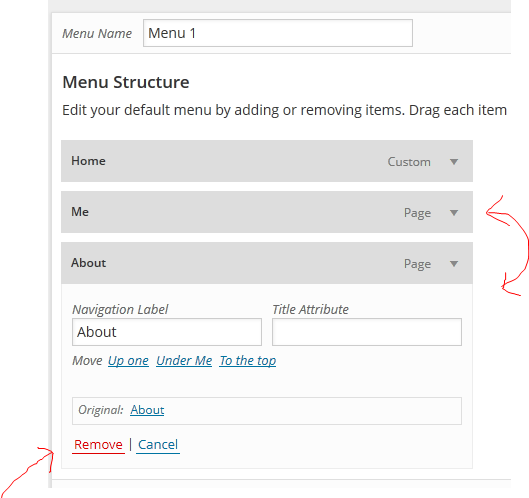
24. The remove a menu option, click on the arrow next to it and click “remove”.
25. In the case of the 2012 theme, there is only one location, “primary”.
Editing a page or a post
26. To edit a page or page, go to pages > all pages or posts > all posts
Trashing a page
27. From the administration menu, go to Pages > all pages
28. Hover the page title and click on “Trash”
Quick edit a page or post
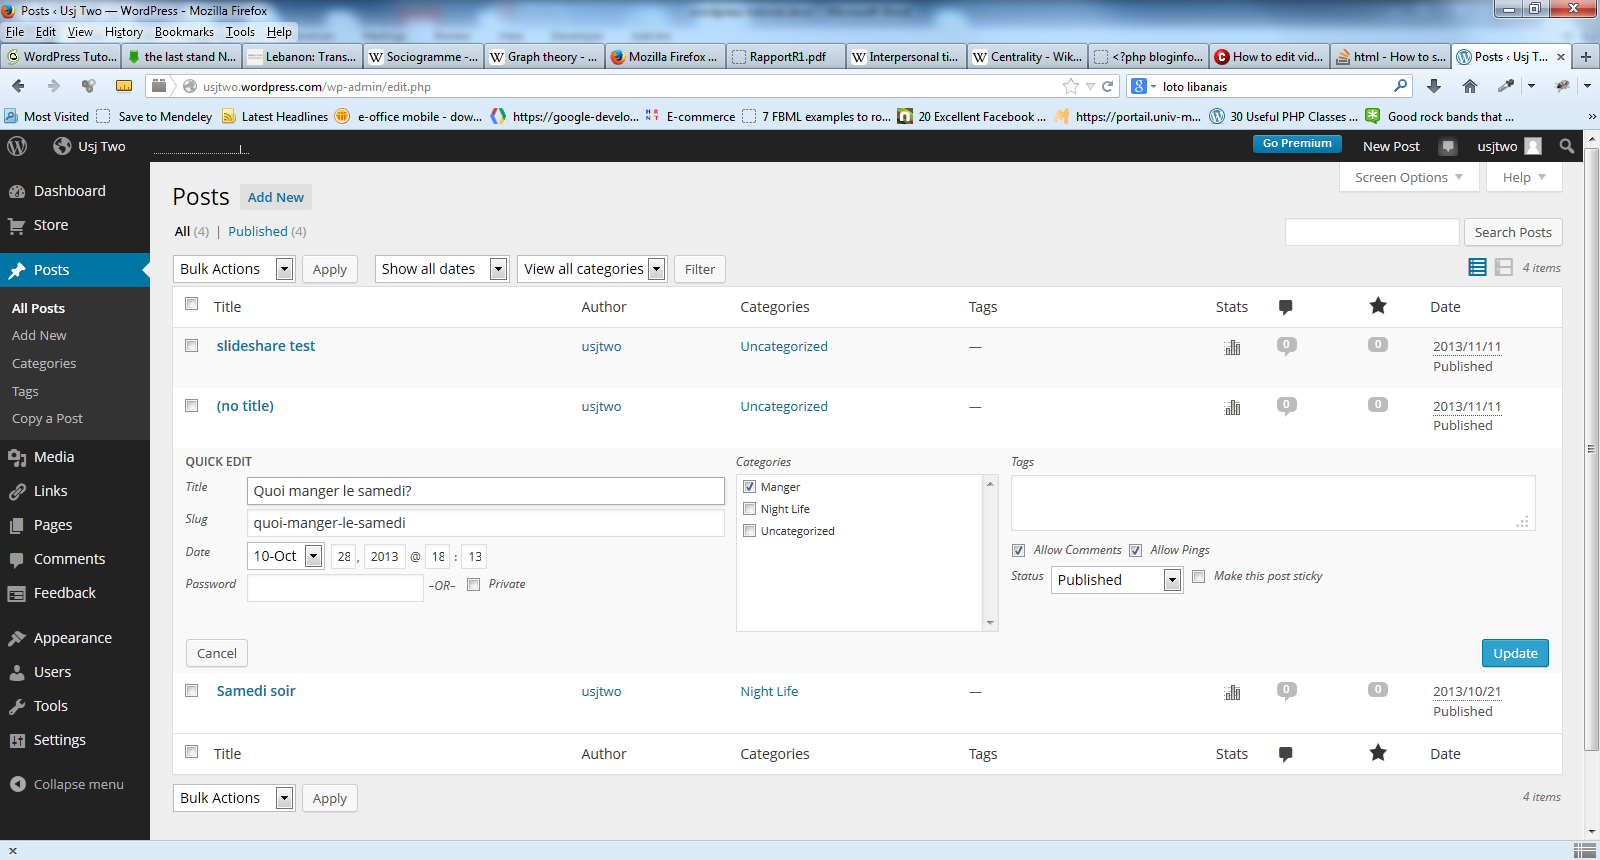
29. Go to Posts > all posts; Hover the post’s name; Click on Quick Edit. Here you can change the title, change the category, change the status, allow or disallow comments, etc.
Allowing and disallowing comments for a post or page
Managing categories
30. To manage categories, go to post > categories
Post Slug
31. Post slug is used to customize the URL (page address) of a post or page. Enter a few lowercase words separated by dashes, describing a post and usually derived from the post title to create a user-friendly (that is readable and without confusing characters) permalink. Post slug substitutes the “%posttitle%” placeholder in a custom permalink structure. Post slug should not be changed and is especially useful if the post title tends to be long or changes frequently.
Themes
32. Switching blog layouts: you can change your template anytime via menu option appearance > themes.
Placing widgets on the sidebar
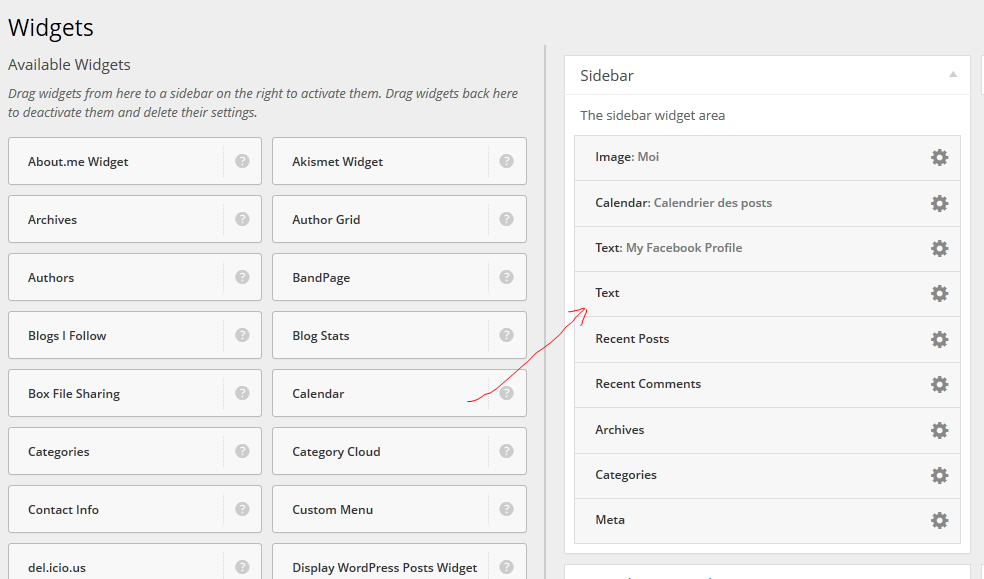
33. Use appearance ? widgets to add interactive elements to sidebar. All you have to do is drag and drop items from the widgets area to the sidebar area. Note the “text” widget to add any time of text to the sidebar. Also note the Top posts & pages that will display your most visited pages.
Changing the Background
34. Appearance > background
Changing options blog wide (comments & ratings)
35. Go to settings > discussions and uncheck “allow people to post comments…” to disallow comments on all new posts.
36. Settings > Rating
Give access to other users
37. Click on Users from the main menu.
Description of users:
Super Admin – somebody with access to the site network administration features and all other features. See the Create a Network article.
Administrator – somebody who has access to all the administration features within a single site.
Editor – somebody who can publish and manage posts including the posts of other users.
Author – somebody who can publish and manage their own posts.
Contributor – somebody who can write and manage their own posts but cannot publish them.
Subscriber – somebody who can only manage their profile.
Invite a follower
38. Users > invite
Edit your profile
39. Users > My profile
Check your statistics
40. Dashboard > site stats
Adding Social Icons and Online Social Networks (OSN) functionality
41. Go to Settings > sharing – In the top area, you can use OSN connect log in to automatically inform your OSN followers and friends when you publish new posts on your blog.
Adding media elements from OSN websites
42. YouTube
via shortcode:
[youtube=http://www.youtube.com/watch?v=JaNH56Vpg-A&list=RD02Kl3UR74jsk0]
Here’s how to embed a video (easiest way):
1. Click the Share link under the video.
2. Click the Embed link.
3. Copy the code provided in the expanded box.
4. Paste the code into your blog or website.
Here’s how to embed a playlist:
1. Click Playlists on the left side of your YouTube page
2. Click the playlist title you’d like to embed.
3. Click the Share link.
4. Click the Embed link.
5. Copy the embed code that appears in the menu below.
6. Paste the code into your website or blog.
43. Instagram
Put one image next to the other in shortcode to achieve best result[instagram url=LINK]
44. SlideShare
Finding Help


